Hardware
Sonic Bike V.4 (aka Sensor Bike)
This version of the bike is currently under development during Kaffe's professorship at TU Berlin (2016). So far we have decided to stick with the Raspberry Pi 2 as well as the GPS receiver and audio system. New additions are a range of sensors that allow for more immediate sound control. A so-called "Sensor Hat" sits on top of the RPi2 and houses an IMU that provides pitch, roll & yaw signals, i.e. heading and tilt. The raw accelerometer and gyroscope data is available too, e.g. In addition there's environmental sensors (temperature, air pressure, humidity) and an LED matrix. The sensors are connected thru an I2C interface which is queried by Python scripts.
Also planned are a number of outboard sensors that connect to an additional microcontroller that forwards data thru a UART (serial) link. Currently this is a Teensy board to which we have connected a cadence sensor based on biased hall effect elements that are pointed at the sprockets of the chain rings. More to follow...
Something where a redesign is currently being considered are the batteries, see below.
Sonic Bike V.3 (current)
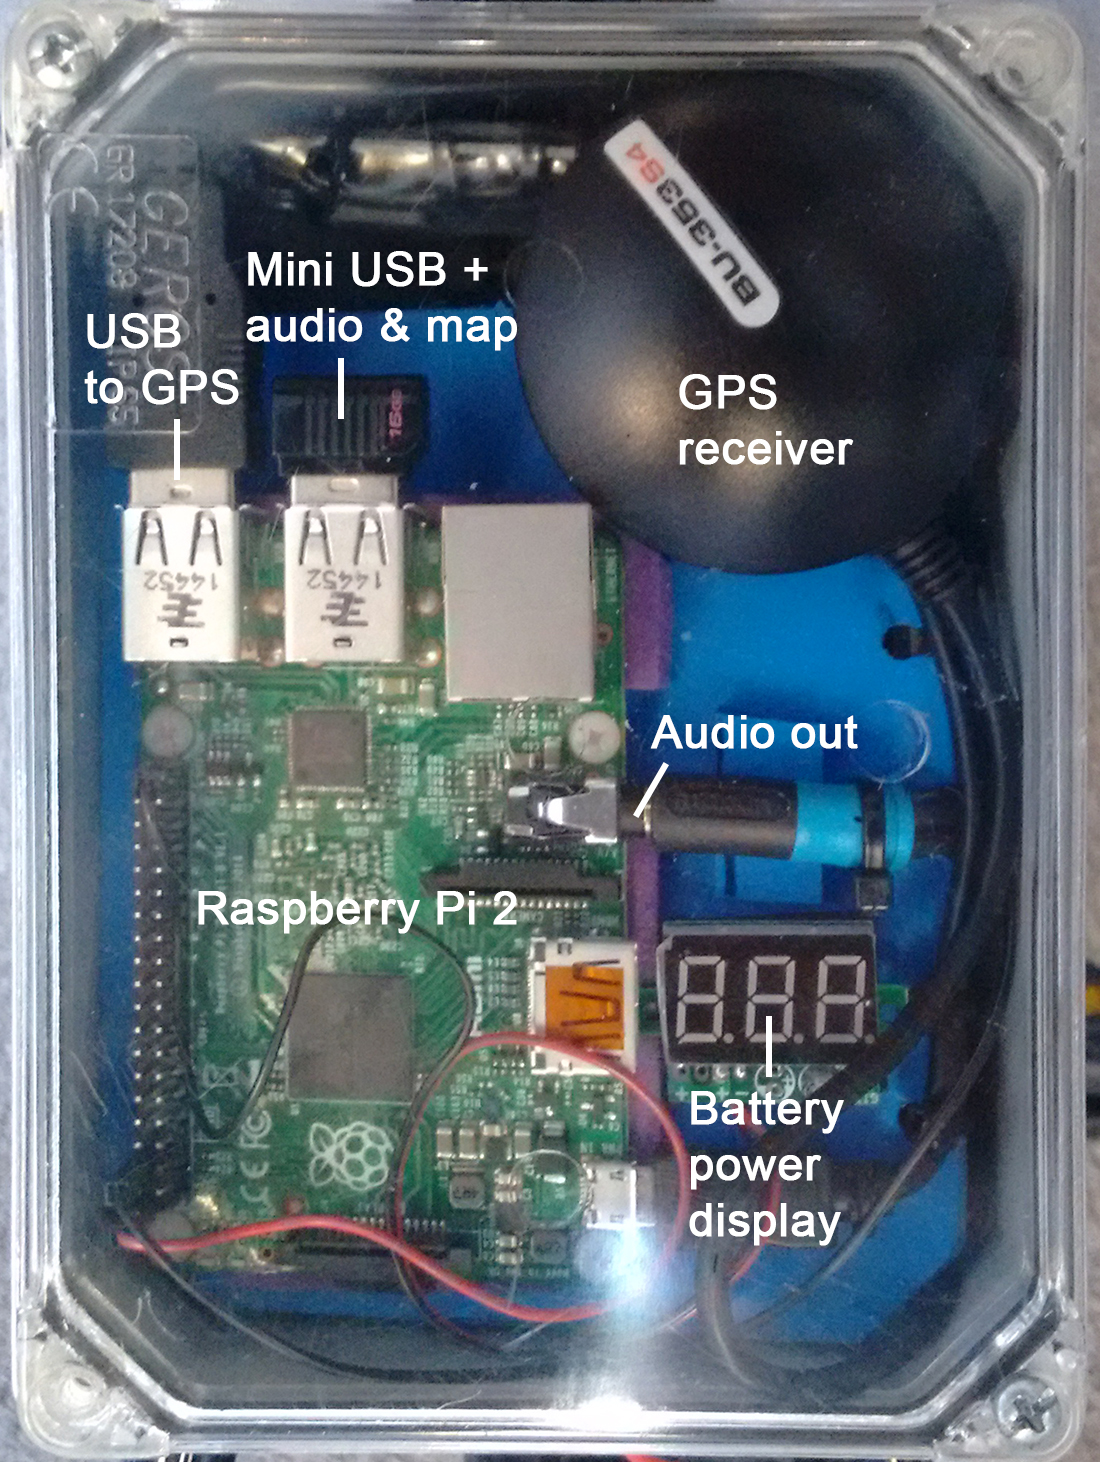
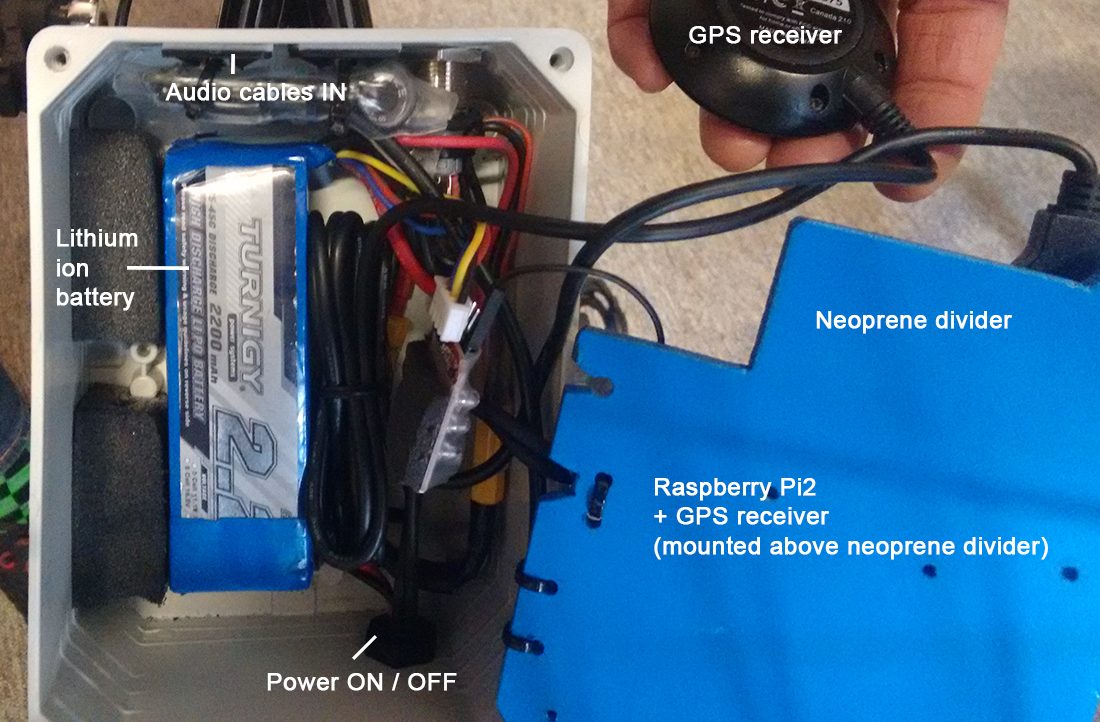
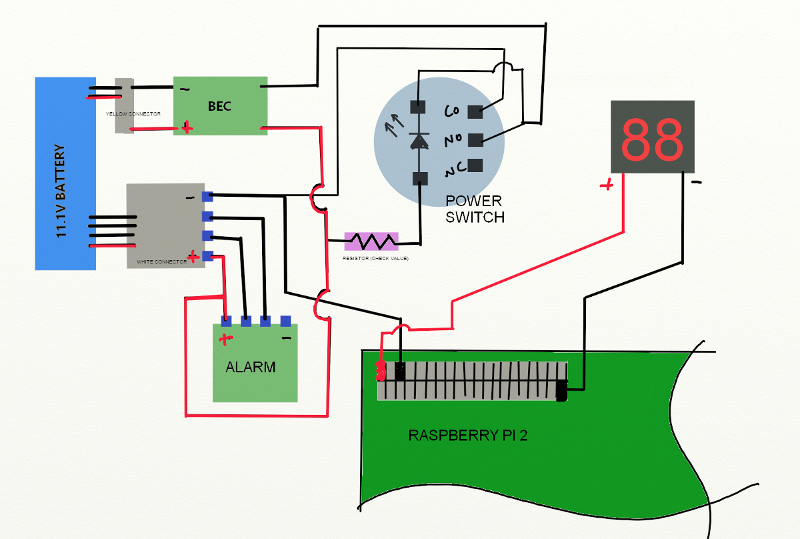
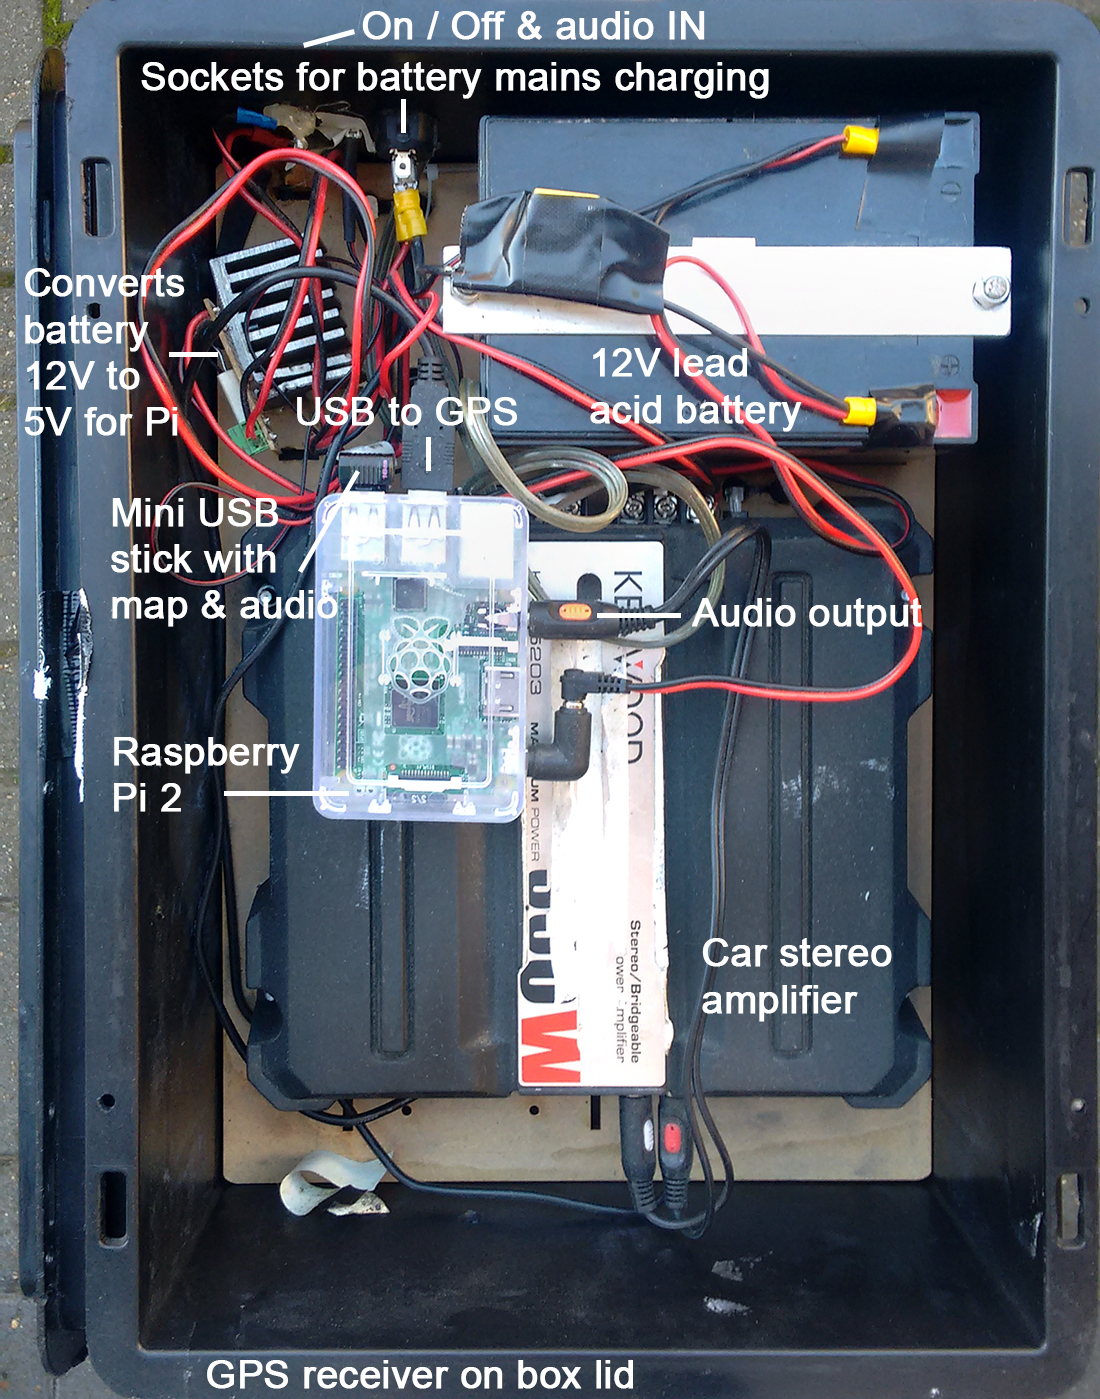
The sonic bikes currently run on a Raspberry Pi2 with a G-STAR IV GPS receiver attached via USB, audio performing through a turtle beach USB dongle to two minirig self-powered speakers + sub. The kit is powered by a LiPo battery(11.1V, 2.2A) transformed to 5V for the Pi. Everything is stored in an IP67 waterproof box, (L150mm x W110mm x D75mm) secured on the bikes frame or rear mounted bike rack. Note the battery voltage digital counter + alarm connected so that user knows voltage output from battery. is 5V and Pi also connected.
Sonic Bike V.2
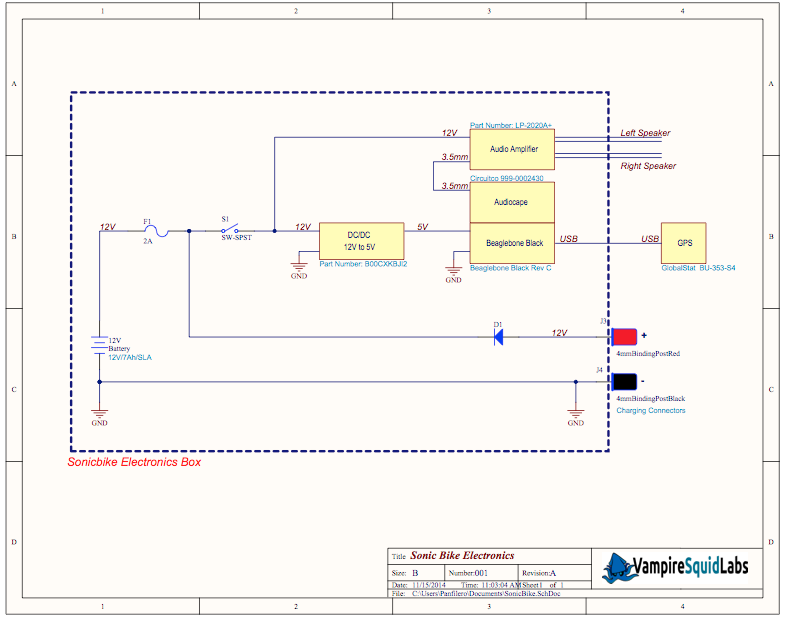
1 x Beaglebone Black Rev C with an audio cape (Circuitco 999-0002430)used on second hand bikes. The Beagleboard, used on the v.1 12 yellow bikes(2012) and sonic bikes-Finland, are no longer available.
Sonic Bike V.1
1 x Beagleboard, requires 5V power. We have made and bought different converters to drop the 12V battery to 5V/3A. Reliable convertors used = SMAKN DC/DC Converter 12V Step Down to 5V/3A Power Supply Module Chuangruifa Car Power Converter - DC/DC 12V to 5V/3A Car LED Display. See part no. in circuit diagram below.
Android phones
These are useful for experimentation and prototyping, if not production use, as they contain lots of sensors, an existing sound system and easily accessible OSC control and wifi support.
GPS receivers(USB)
V2 & V3 (current): GlobalStat BU-353-S4 receiver, 1 per bike.
V1 : WGM-302U, 1 per bike.
Battery
Note: use a short and/or high quality USB cable when powering from a battery
V4: a number of options are currently under consideration.
The problem with the 11.1V LiPo is that it requires a balancer for proper charging. This could be solved by a multi-pin socket plus matching adapter cable towards the outboard charger. Another approach could be to charge unbalanced during events, but take the battery outside the case and charge it properly afterwards when there is more time.
The alternative is to use a (single-cell) 3.7V LiPo where no balancing is required. While the 11.1V LiPo requires a step-down converter, the 3.7V needs a step-up converter, e.g. the Adafruit PowerBoost. This particular board also includes a low battery detector which is useful to prevent the batteries from a deep discharge.
Another option are easily available USB "power banks". No step-up/down converters required. Some examples: 2600mAh, 8000mAh, 9600mAh. Only problem with these is that they charge slow. However, if you pick one with a large enough capacity one can power the RPi for a whole day and recharge overnight.
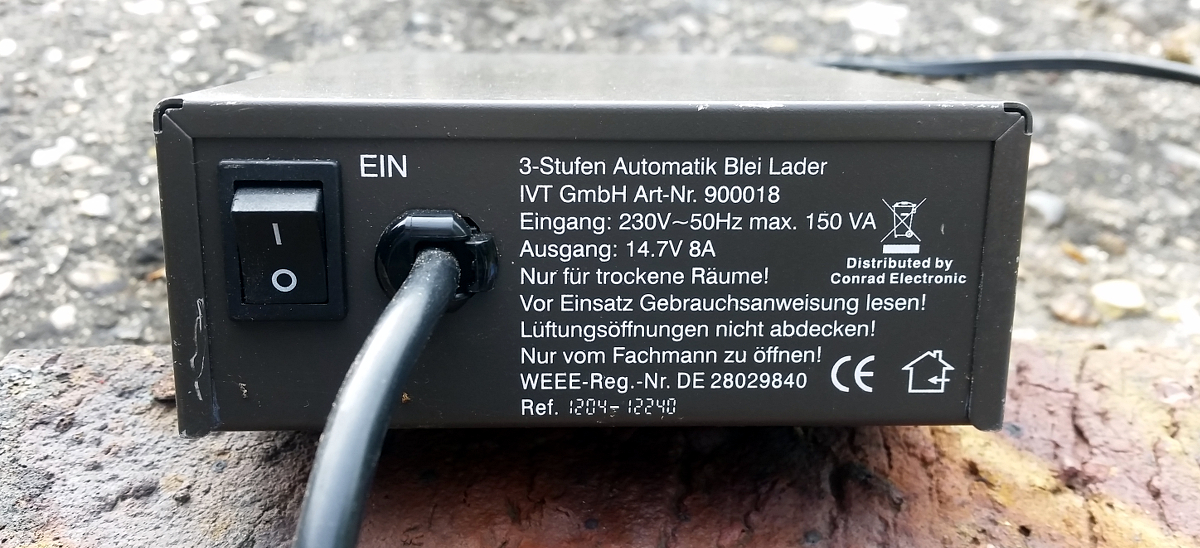
V3: IVT intelligent battery charger for trickle or fast charging 12V batteries for sonic Bikes
V1 & 2
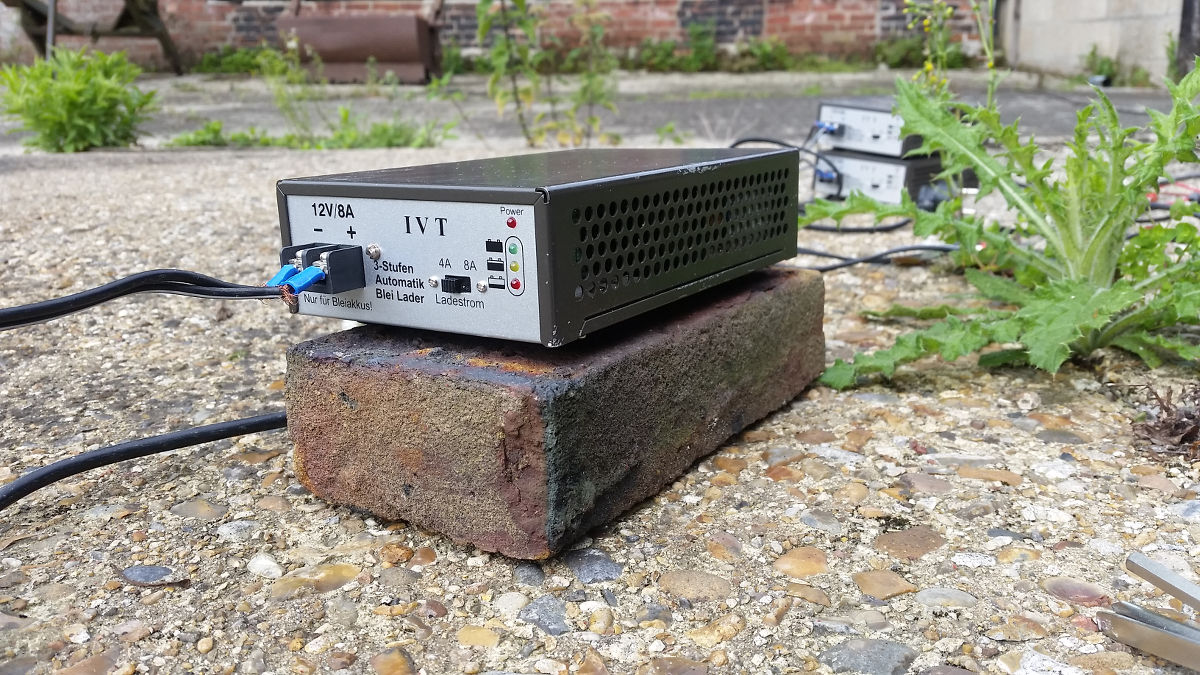
We used to use: LiPo Turnigy 2.2A 3 Cell, 11.1V, 1 per bike Maintains charge around 3-4 hours. 1 LiPo battery charger required, eg. Overlander RC6-VSP, 80W/7A. Read all literature and understand your Lipo battery. If mishandled, they can explode.
V1 and V2 : 12v 7AH SLA lead acid battery,(often used for motorbikes), 1 per bike Intelligent 12V trickle+fast charger required. 1 per 2 bikes.
We have tried solar powered trickle chargers to maintain battery charge, so far with only detrimental consequenves to computers/PS.
Long term we're interested to develop a robust system to power the sonic bike through cycling.
Sound system
V3(current): 2 x self powered bluetooth/cable minirig speakers and sub woofer, per bike.
V2: when we can find them, 1 x pair Tangent EVO E4 speakers per bike (No longer made. Ideal speaker size is 4.9 x 7.5 x 6.3"/ 125 x 190 x 160 mm to fit on the bar design, under the handlebars leaving enough space for knees. Horribly difficult to find. Any leads, please let us know. The solution to this situation is the minirigs)
V1: 1 x pair Tangent EVO E4 speakers per bike.
Speaker frequency range of 70 - 20,000 Hz is required. The extra 10Hz at the bottom essential.
Long term, transducers and bass boxes are to be explored within bike design.
Sensors
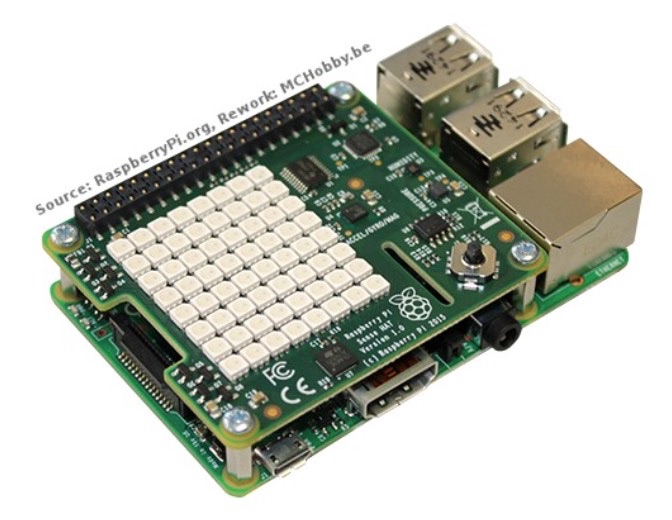
Integrates gyroscope, accelerometer, magnetometer, temperature, barometric pressure, humidity, and an LED matrix on a board that plugs into the RPi GPIO header and sits on top of it (a so-called "hat"). There's an on-board microcontroller that "cooks" the data from the first three sensors to provide pitch, roll & yaw signals. This is sometimes also called an IMU (inertial measurement unit). In other words this gives us an immediate heading, compass-style, that is way faster than waiting for GPS data to indicate a new direction. It also gives us the tilt of the bicycle, where mostly the sideway tilt is useful, e.g. when you're going into a curve. However, the forward/backward tilt is available too, e.g. when you're doing a wheelie.
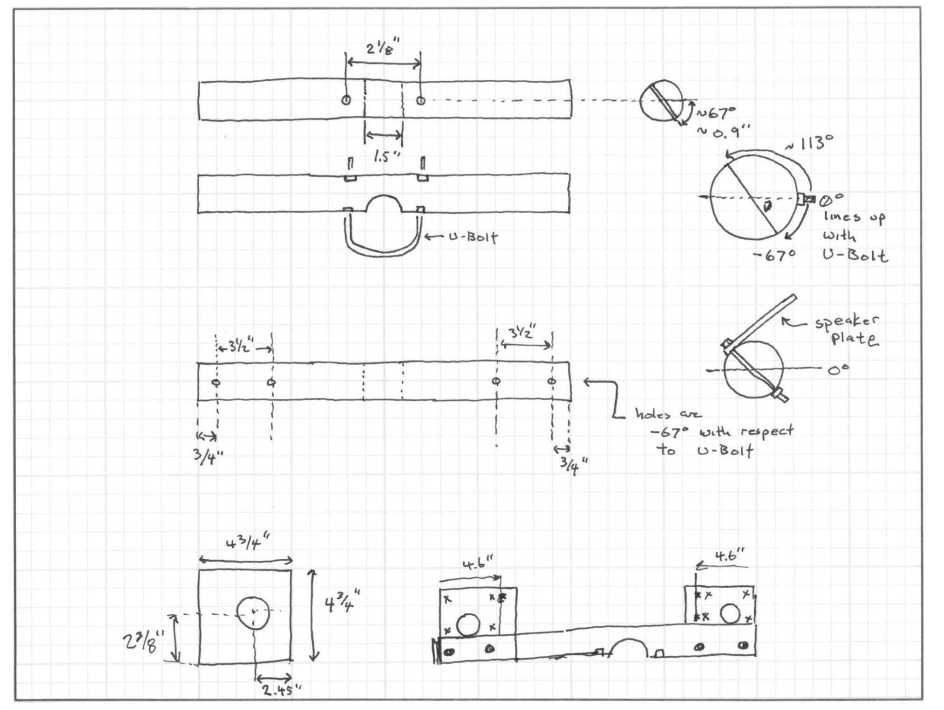
Cross bar for speakers
All versions of bikes so far have been based on this design, with changes in dimensions occurring due to particularities of individual bikes.
Using a steel bar cut to size and attach to the bike in the following way.
- Make sure the speakers are angled to the face of the rider so as to immerse them in the sound, and that the tweeter of the speaker is on the RHS *
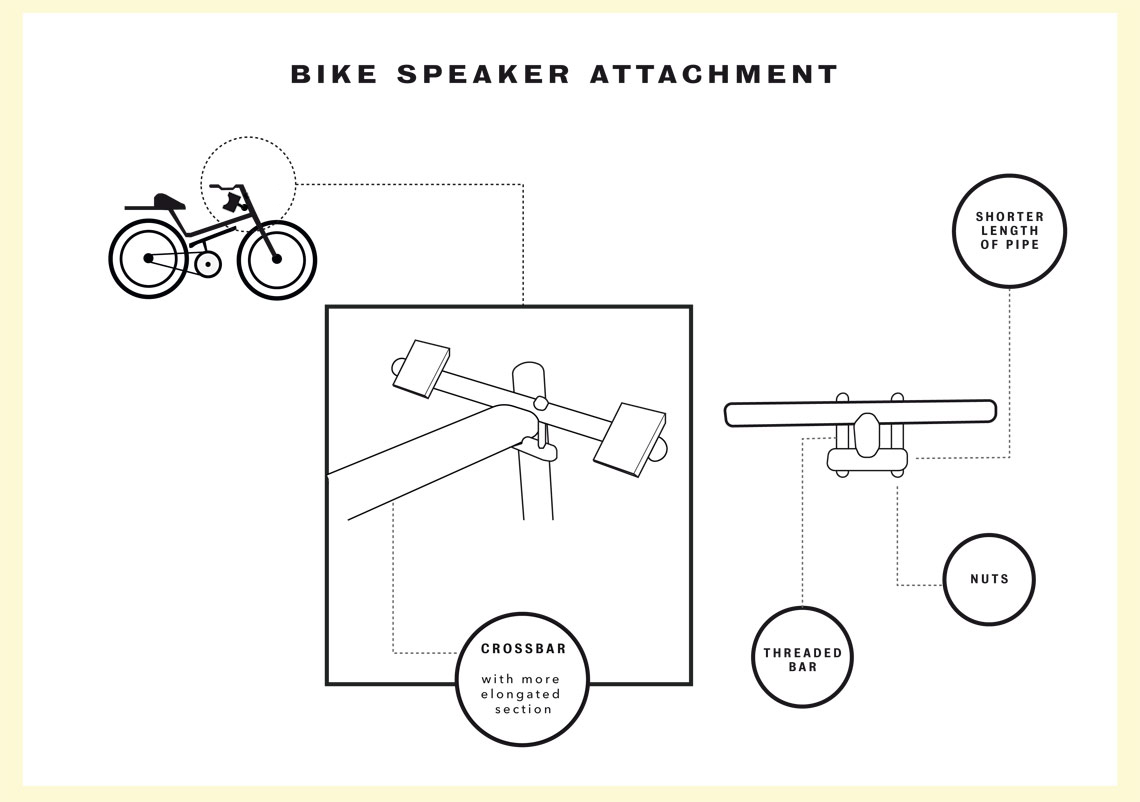
Here are the exact measurements:
Here is a guide for the angle of the speakers:
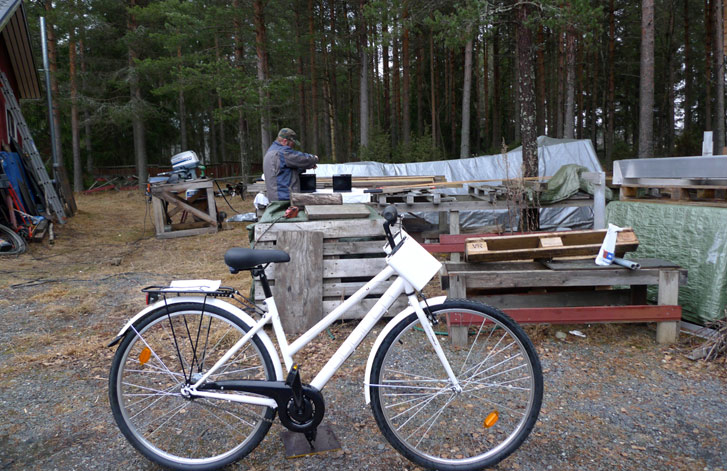
Kit box
We're using a number of different kit boxes on different bikes.
Sonic Bike
V.3 (current)
Sonic Bike V.2
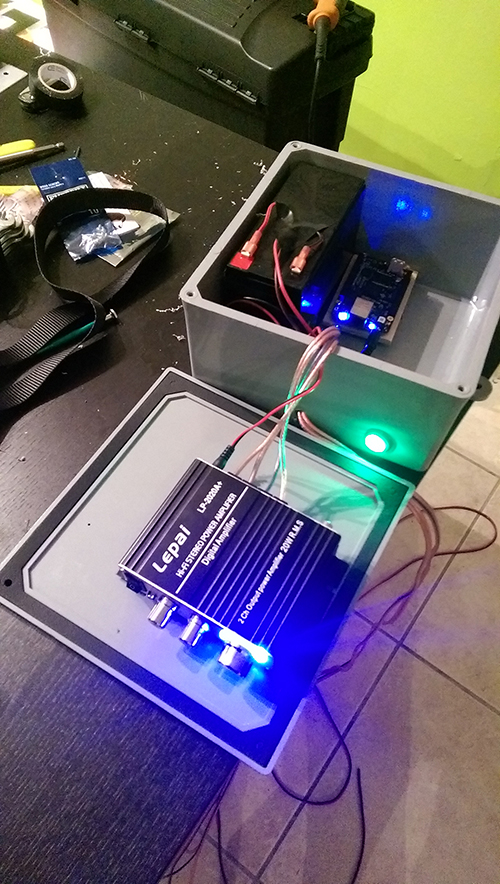
Using an 8 in. x 4 inch Junction Boxes from Home Depot http://www.homedepot.com/p/Carlon-8-in-x-4-in-Junction-Box-E989N-CAR/100404099 This box has tabs on the sides so that you can screw them onto the bike rack. Super easy to fit therefore. Sprayed black.
Sonic Trike
Using a plastic kit box from Maplin (with translucent lid) http://www.maplin.co.uk/c/components/project-boxes/plastic-boxes
